My weekend task this week was simple!
A Sandisk and Raspberry Pi based NFS/NAS wireless mount for my MacBook 🙂
Hardware used:
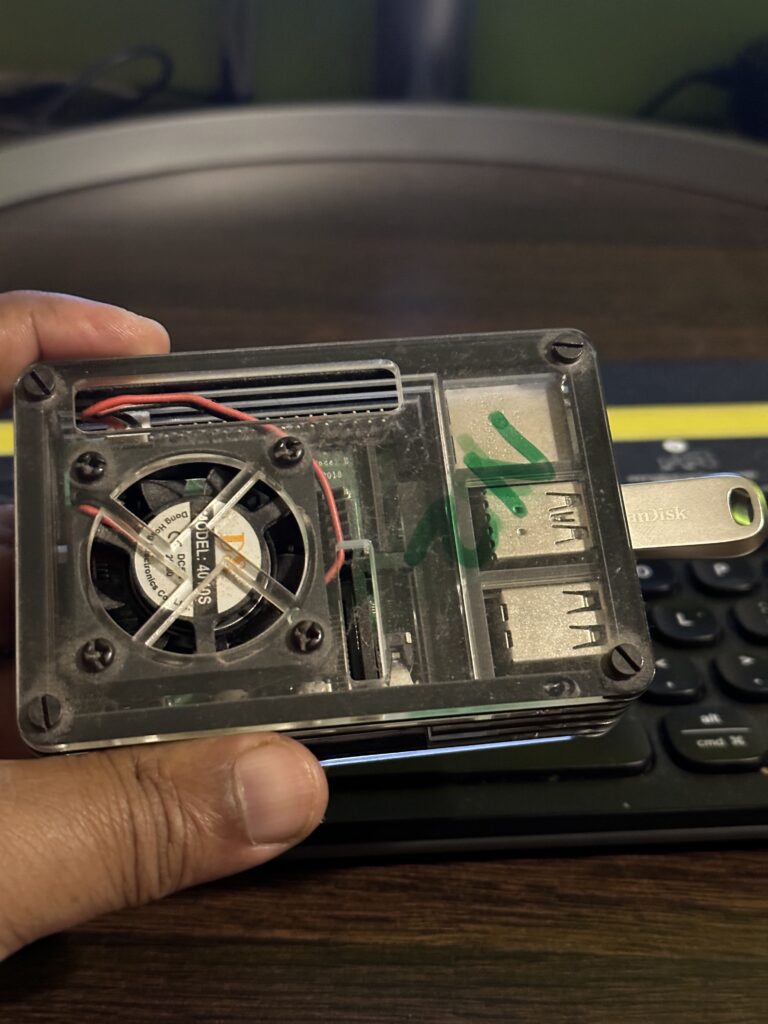
3 nos Raspberry Pi 4b (wireless)
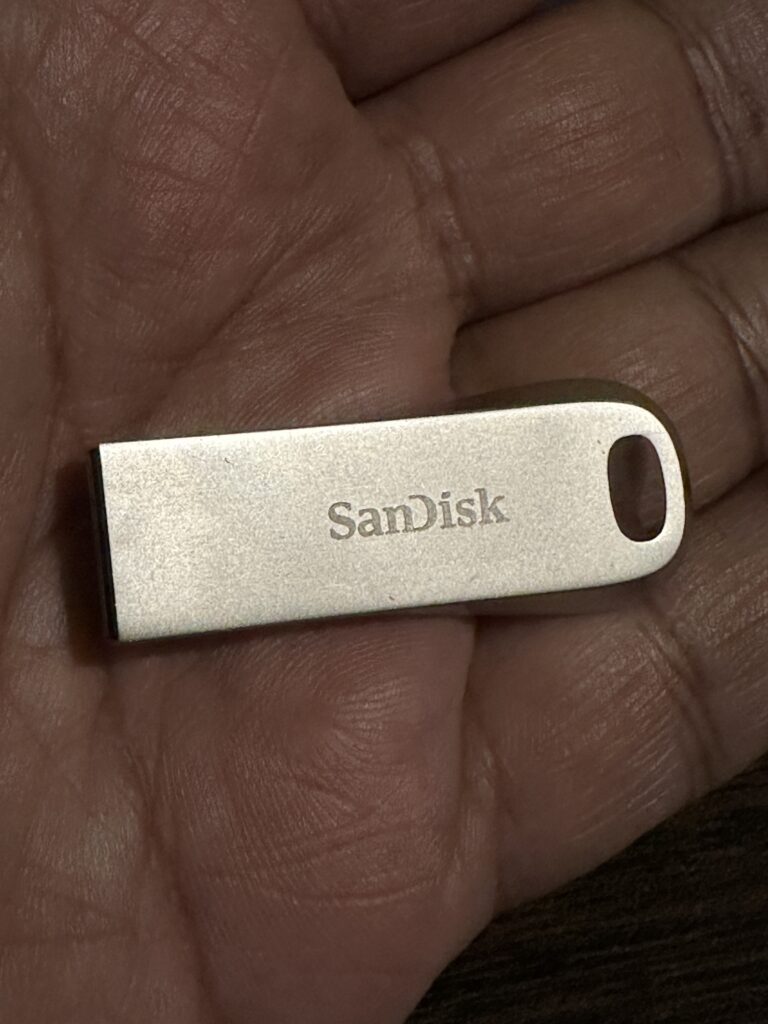
Sandisk USB 3.1 128gb Pen Drives
3 nos SDcards – Sandisk – 32gb
First Steps
First steps obviously would be to get an OS up and running on the Pi’s. I went with Ubuntu 64 bit and used the Pi Imager to install the OS
Post install, updated the install by running
sudo apt update && sudo apt upgrade -yCreating swap (optional)
By default, Ubuntu install on Raspberry does not come with a SWAP partition. I needed SWAP in case I needed to run additional tools/applications on the system at a later time. So enabled Swap using below commands
sudo fallocate -l 2G /swapfile
sudo chmod 600 /swapfile
sudo mkswap /swapfile
sudo swapon /swapfile
echo '/swapfile none swap sw 0 0' | sudo tee -a /etc/fstab
Networking
The 4b series of Raspberries come with wireless cards built in – which makes installation super simple
While installing, I chose the node names – simply calling the machines n1.local, n2.local and n2.local
As I had chosen the SID for the wireless router and pre-filled in the Wifi password and created a user account called “ayan”, I would log in without having to first connect to the Raspberry machines and setting up the user accounts and connecting to Wifi
On the Router, I logged in and created rules that tied n1.local, n2.local and n3.local to specific IP addresses, so the IPs remain static post reboot
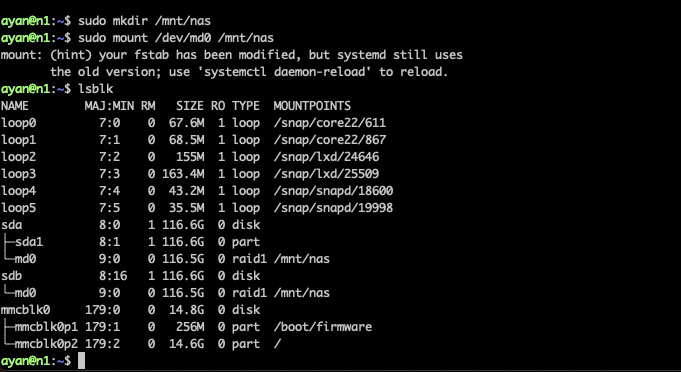
Adding Storage 🙂
Since these are Raspberry modules and come with only one SDCard slot, I needed additional storage. This was done by adding the USB Thumbdrives/Pen Drives to the USB ports of the Raspberry machines ensuring these can be seen and accessed. I also wanted failover simulation and so, used mdadm to raid the USB drives to simulate real world Raid 🙂
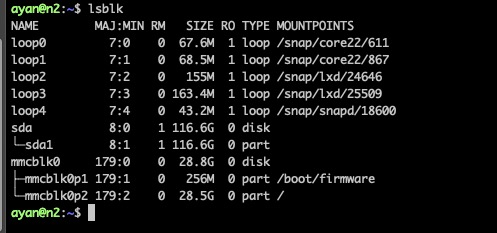
By default, the disks are detected as /sda and /sdb as below. SD Card shows up as mmcblk*

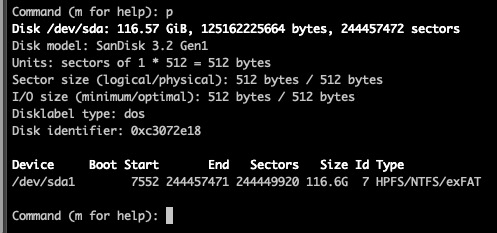
I used fdisk to create a file system on the drives
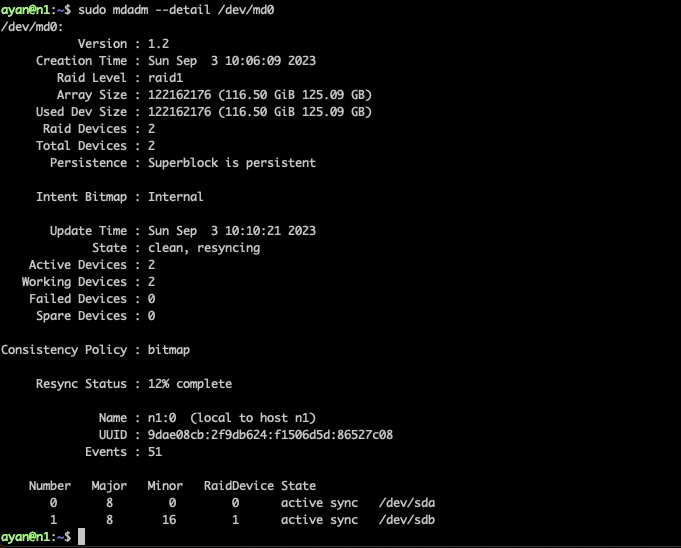
Then used mdadm to create a md0 RAID device spanning both the drives. Used the –detail command to see the sync status. Below we can see the total RAID devices and state – which in this case, shows as resyncing
mdadm — installation and steps
sudo apt install mdadm
sudo mdadm --create /dev/md0 --level=mirror --raid-devices=2 /dev/sda /dev/sdb
sudo mdadm --detail --scan | sudo tee -a /etc/mdadm/mdadm.conf
Update initramfs
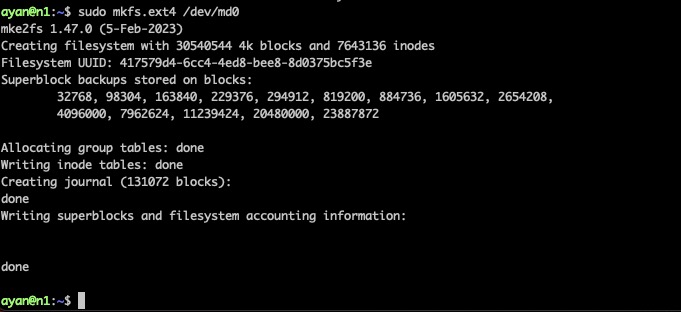
sudo update-initramfs -uI then created a filesystem (sudo mkfs.ext4 /dev/md0) and added the mount to /mnt/nfs where “nfs” will be my exports name – when I share the volume across
We can now create a mount path, and mount the device 🙂 At this point, if everything has gone fine, the mount should be seen by the OS (lsblk, df -h etc can be used)
Once the filesystem is created and mounted, created a test file “blah” on the share – this file I will use as a test for testing the share later on from the Macbook 🙂

The trouble with this mount is that this will be unmounted if the OS is rebooted, as the fstab still needs to be updated. This can be done as below
echo '/dev/md0 /mnt/nas ext4 defaults, nofail 0 0' I sudo tee -a /etc/fstab /dev/mdo /mnt/nas ext defaults, nofail 0 0
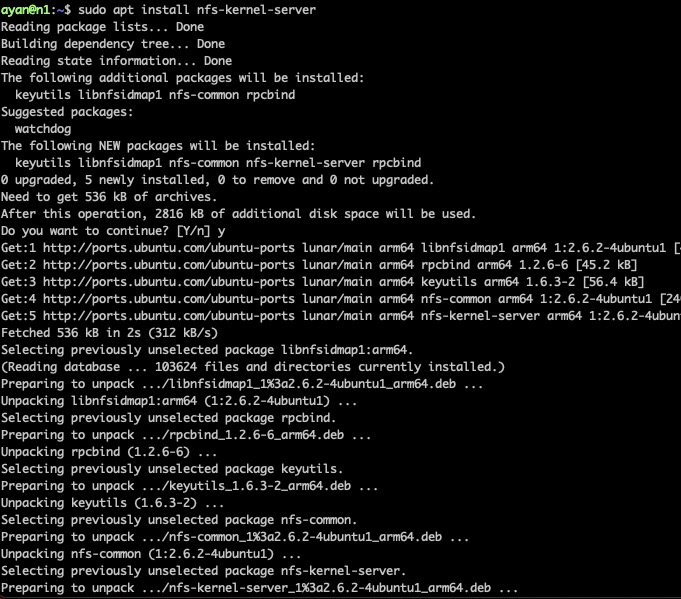
NFS server can be installed using the sudo apt install nfs-kernel-server
The NFS daemon can be enabled using sudo systemctl enable –now nfs-server

At this point, we need to use MacOS specific export options for exporting NFS. After some trial and error, this nfs_exports option worked for me
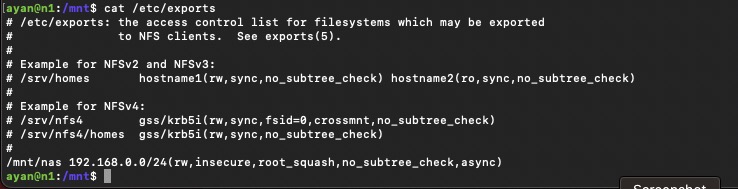
Essentially since I am on the 192.168.0.x network, and there are multiple devices, I just used 192.168.0.0/24 🙂
Now comes the fun part!
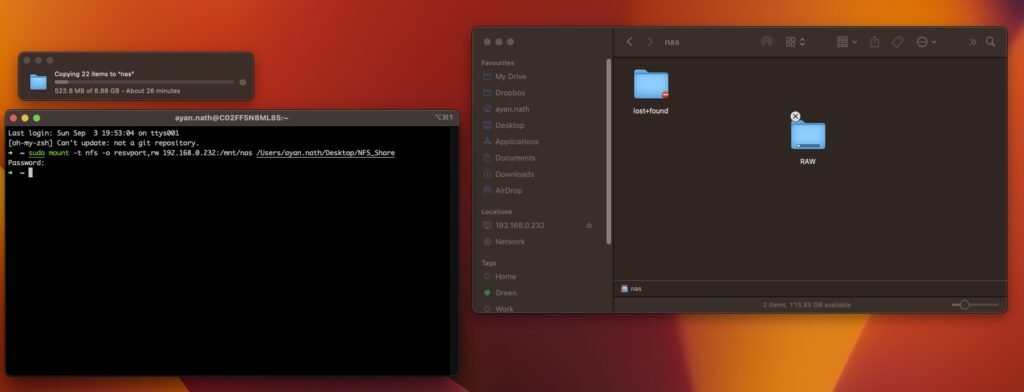
Logged in to the Macbook and created a mountpoint on the desktop. Then used the following command to mount the share

sudo mount -t nfs -o resvport,rw 192.168.0.232:/mnt/nas /Users/ayan.nath/Desktop/NFS_ShareBelow, I am copying a folder from the desktop wirelessly to the NAS box – in this case the Raspberry Pi 🙂
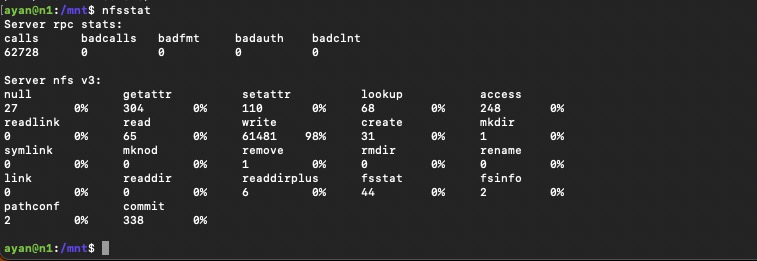
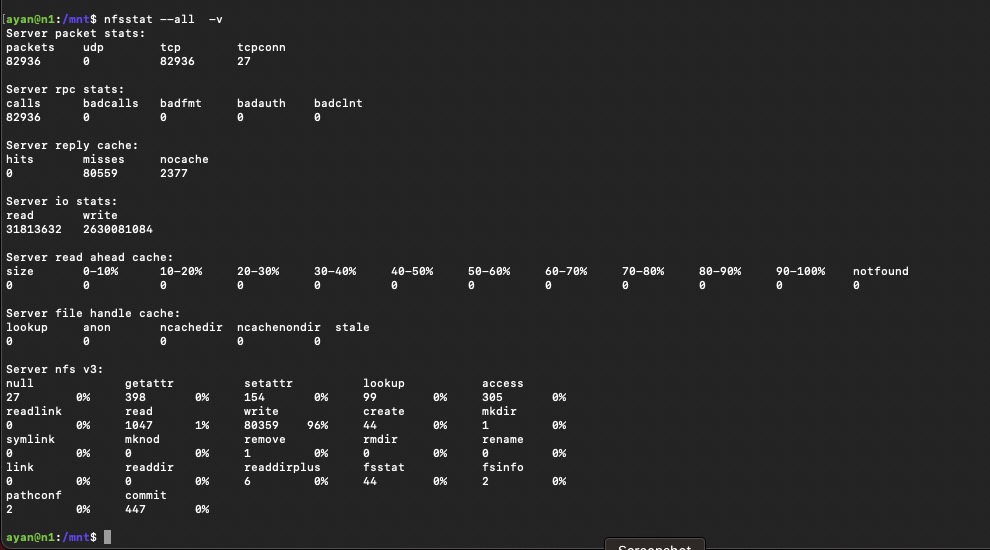
Random stats and figures from the NAS box for the nerds
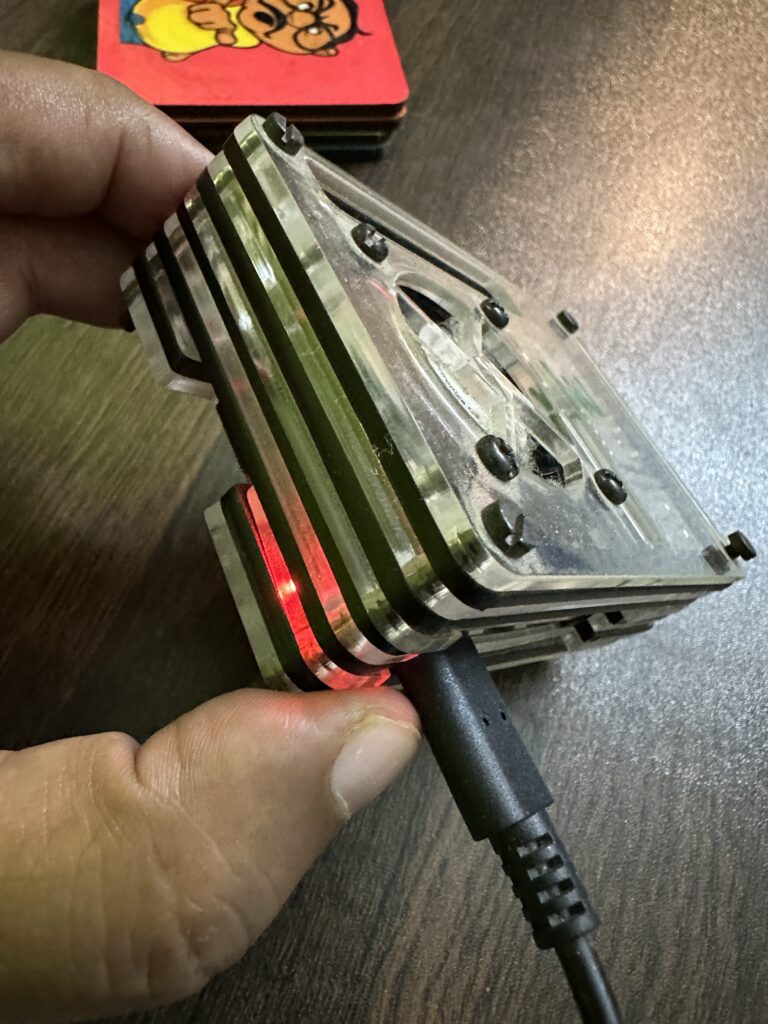
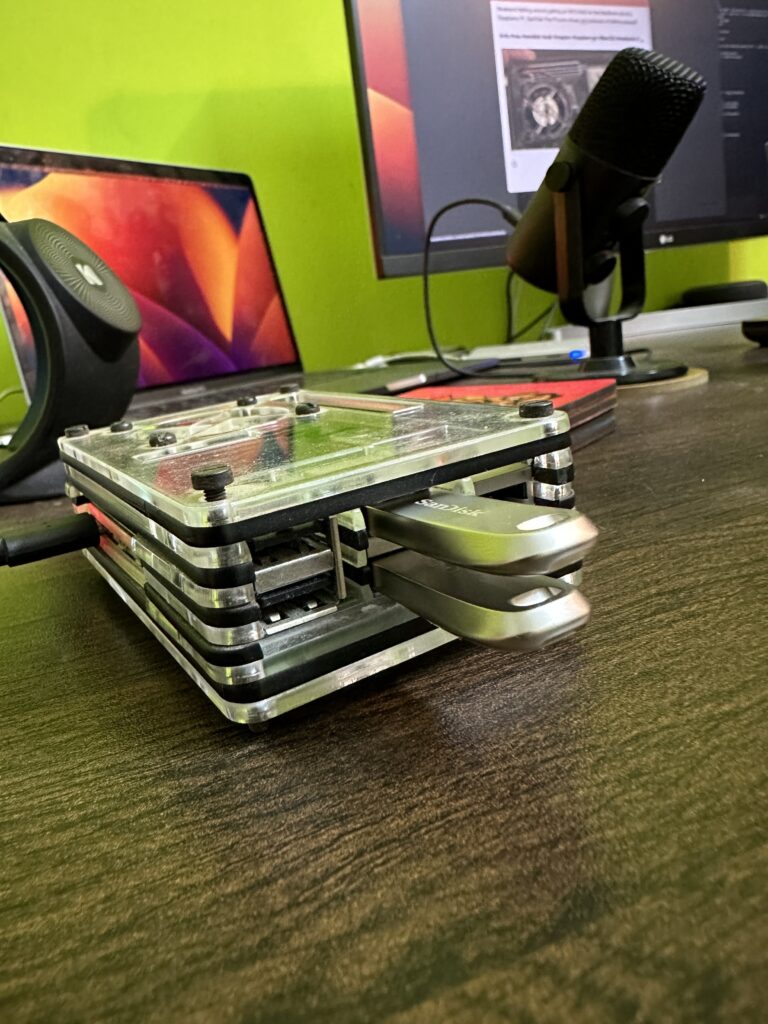
And last but not the least, the devices in question 🙂
Eyecandy

Next steps for another week
- Test Failure and Recovery (disconnect one USB at a time maybe)
- See if I can hook up the additional two Raspberry PIs to give me a redundant NAS (should be fun 🙂 )
Points to remember
- This is a Raspberry powered NAS test rig running on USB storage – so performance is never the intent here 🙂 Performance or the lack thereof, is expected
- Replace the USB Pen Drives with an externally powered USB drive for better performance ( I think – not tested, maybe I will)
- No redundancy if the single Raspberry goes down